Perforated window films provide an effective way to promote your brand, send a message, or highlight creative designs on storefronts, at educational institutions, and in other public settings. For optimal results, it’s important to closely follow established installation techniques and tips, and this guide will outline the best practices to follow when you install your next perforated window film.
Why Use Perforated Window Films?
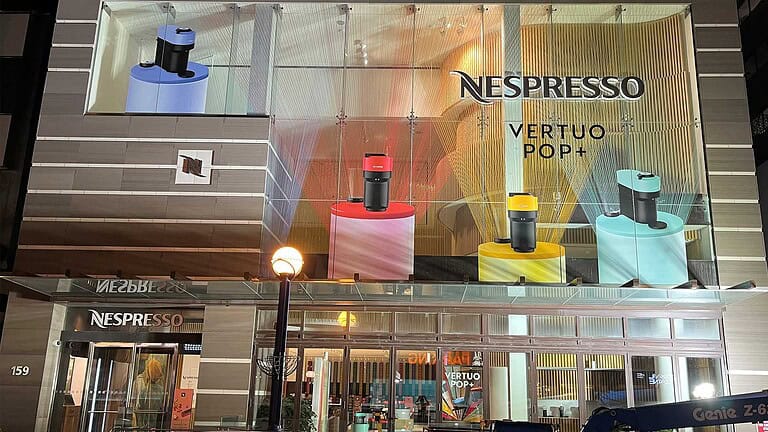
Perforated window films are made of a flexible, perforated PVC or vinyl that is adhesive backed for application to glass surfaces. Choosing the right film will ensure it can endure weather conditions and last up to seven years. Plus, since perforated window films can help you to showcase unique designs and messages, they’re effective choices for advertising.
Areas where perforated window films can be placed include:
- Commercial vehicle windows
- Public transit windows
- Buildings
- Architectural features
- Storefront windows and entryway doors
- And more
Step-by-Step Guide for Installation
When installing perforated window films, it’s important to follow the manufacturer’s handling and installation instructions as closely as possible so they will perform at their best. Here are some key tips to keep in mind.
Before Installation
Prior to applying the perforated window film, it’s essential to check if the surface is suitable. Painted surfaces, textured glass, or anything with coatings may be unsuitable for installation. We recommend testing the surface with a sample to ensure the film adheres properly before beginning the complete installation process.
Once the surface is deemed compatible for installation, you will need to make sure the surface is cleaned properly. To clean the surface, we recommend using soap and water only. Avoid any solvents or ammonia-based cleaners. Once cleaned, rinse with water and completely dry the surface.
Another element to keep in mind before installation is the outside temperature and temperature of the glass itself. Most perforated window film products can only be installed in temperatures +50 °F or greater, and it’s highly advised to avoid installation during inclement cold and hot weather.
Installation Start-to-Finish Tips
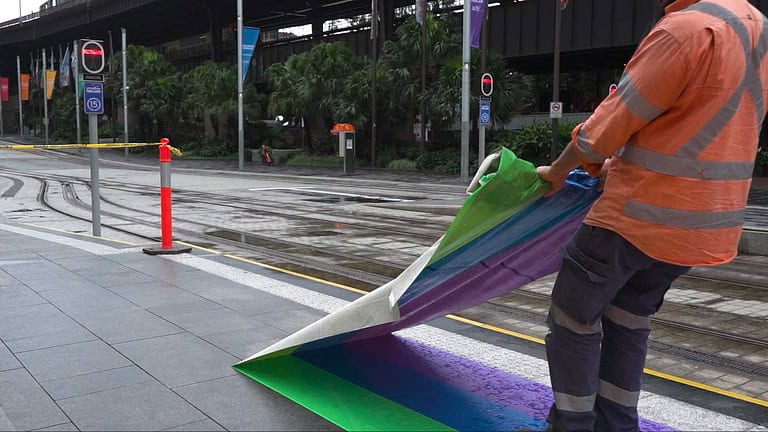
Now that you’re confident you have the ideal surface and environment, you can begin the installation process. First, fold back the edge of the liner to about 3–5 inches. Position the graphic so it’s in line exactly where you want it to be placed and press the corners using light pressure. We recommend using your hand or a plastic squeegee to further press the film in place.
From top to bottom, continue peeling down the liner and apply continuous pressure with your hand or squeegee to apply the graphic. Proceed by pulling down the liner 3–5 inches each time until it’s completely removed. Squeegee from the center to the edges in all directions to ensure that the graphic is firmly secured.
To avoid any edge curling, we recommend applying optically clear edge seal tape, optically clear laminate, or liquid edge seal along the ends of the film. This will help prevent the edges from lifting. If you’re installing more than one panel, we advise that you butt seam the panels instead of overlapping them. Overlapping the seams is less attractive and unreliable.
To accommodate glass expansion and contraction, trim the film to leave a 1/8” to 1/4” gap between the graphic and the window edge, seal, or frame. Window films should never be applied to the window edge, seal, or frame as it may cause the graphic to detach.
If you follow these guidelines during the installation process, it will result in a beautifully placed graphic that will help you spread your essential messages.
Additional Tips for Successful Installation
Other best practices to follow during installation to achieve a worthwhile outcome include:
- When using multiple panels, make sure to seal them with laminate, edge seal tape, or liquid edge sealer.
- If there’s any kind of extra part of the graphic that is not needed, we recommend using a utility knife to trim it away.
- If you see bubbles, this is most likely caused by gases from printing escaping, which can be normal to see after installation. Like with unperforated window films, we typically see most bubbles disappear in a few days. Do not try to pop the bubbles with a knife!
- To clean the graphics once installed, we advise using mild detergents and a soft rag. Avoid spraying graphics with high-pressure sprayers, which can cause the edges to lift.
Find the Perforated Window Film That Works for You
At Continental Grafix USA, we offer a wide variety of perforated window films that vary in perforation ratios, dimensions, and visual properties.
For any of our films, it’s critical to read the data sheet and handling guide thoroughly to ensure you have a complete understanding of the product and the best practices for application. If you’re not ready to purchase , order a free sample so you can test the film’s performance.
Have More Questions About Installation? Reach Out to Our Team
We’re ready to provide you with the best perforated window film solutions. Reach out to us today to discuss your needs.
Related News
Choosing the Right Material Matters for Residue-Free Removal
Why Printers and Installers Should Care About Dimensional Stability
Ultra Removable Window Graphics for Retail, Events, and Glass Surfaces